
Connection
Start of the app
At start, the app will attempt to connect to the hardware scan controller using a USB connection.
If a USB device is not found, then 'Connect TCP' button will be enabled.
USB connection
This is typical for initial hardware installation, or if the TCP settings are no longer function on the local network.
- Ensure that the point electronic USB driver is installed on the service computer.
- Connect the 3 m USB cable provided with the hardware from the scan controller to the service computer.
This cable is a standard USB cable, so other similar USB cables may be used, but please be aware of cable length limitations when USB extension cables are used.
Initial network configuration at hardware installation should be done with the USB cable provided with the hardware!
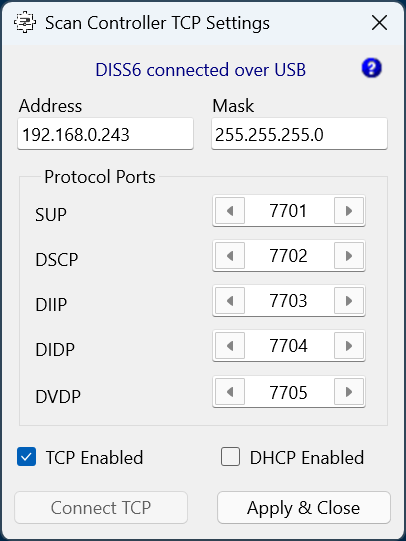
- Start the Scan Controller TCP Settings app from the Microsoft Start Menu. USB connections status will be confirmed in the first text line in the app as '[...] connected over USB', as for the example below.
TCP connection
This is typical for IP address changes in a working network, else please default to the USB connection.
At start, the app will inform in the first text line that 'No USB Device found', however the 'Address' and 'Protocol Ports' text field are editable. Please read this address and ports from the display panel on the front of the hardware scan controller, and input here.
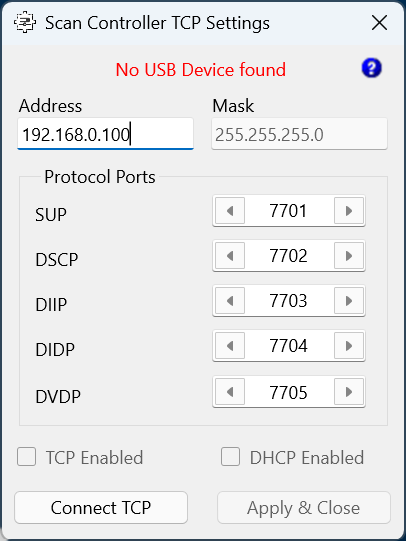
Press 'Connect TCP'. The app will attempt a connection, and if successful the status text line will be updated to show '[...] connected over TCP'.