
Description & Operation
This app is provided to set TCP/IP settings for REVOLON and DISS6 scan controllers. It is needed for the initial hardware installation on the microscope or lab network, and for subsequent changes to the network.
Please make sure any TCP/IP change is compatible with the existing network!
For connection to the scan controller, client apps will also require these TCP/IP settings. If a client app fails to connect to the device, please double check app setting with the TCP/IP settings on the display panel on the front of the hardware scan controller.
At start, the app will attempt to connect to the hardware scan controller using a USB connection. It's also possible to connect to the hardware scan controller using a TCP/IP address, as explained further down, however this requires a working network configuration.
Connections
USB connection
This is typical for initial hardware installation, or if the TCP/IP settings are no longer correct for the local network.
Please connect the 3 m USB cable provided with the hardware from the scan controller to the service laptop/PC. This is a standard USB cable, so other similar USB cables may be used, but please be aware of cable length limitations when USB extension cables are used.
Initial network configuration at hardware installation should be done with the USB cable provided with the hardware!
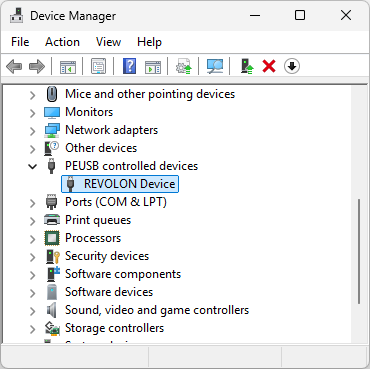
The service laptop/PC must have the PEUSB driver installed, so that Windows can provide access to the device. Please check in the Windows Device Manager.
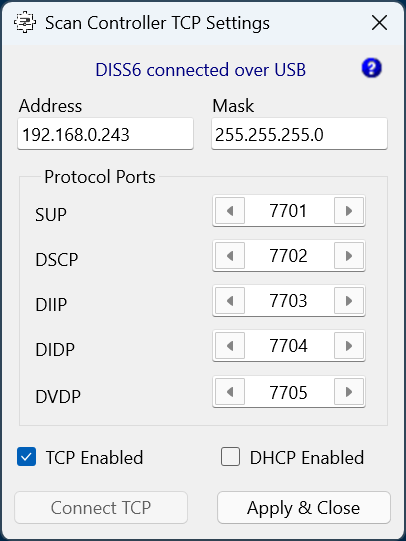
Start the Scan Control TCP/IP Settings app from the Microsoft Start Menu. USB connections status will be confirmed in the first text line in the app as '[...] connected over USB', as for the example below.
TCP/IP connection
This is typical for IP address changes in a working network, else please default to the USB connection.
At start, the app will inform in the first text line that 'No USB Device found', however the 'Address' and 'Protocol Ports' text field are editable. Please read this address and ports from the display panel on the front of the hardware scan controller, and input here.
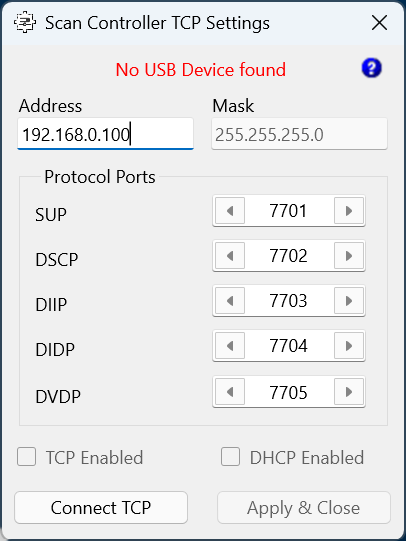
Press 'Connect TCP'. The app will attempt a connection, and if successful the status text line will be updated to show '[...] connected over TCP'.
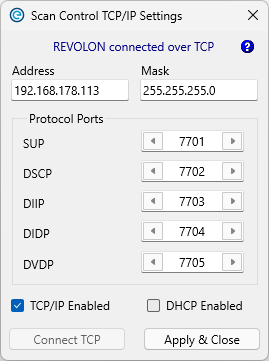
If connection is not successful, then an timeout error message will be shown.
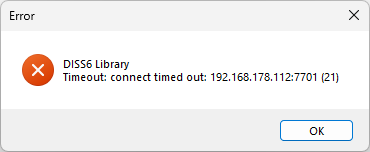
If the app gives a timeout error for the Address and Ports given on the device display panel on the front of the hardware scan controller, then please double check the cable connection. If a router is used, then please also check it's firewall settings.
Configurations
Manual IP
Manual IP is the most common configuration, however the lab manager must keep track of devices and their fixed IP addresses.
Please request the reserved device IP address from the lab manager.
Make sure that
- 'TCP/IP Enabled' is checked (default for REVOLON)
- 'DHCP Enabled' is not checked (default for REVOLON)
- 'Protocol Ports' are set to 7701...7705 (default for REVOLON)
- 'Mask' is set to local network requirements
- 'Address' is set to local network requirements
Click on 'Apply & Close', which will prompt to switch the device off and on again to apply the settings.
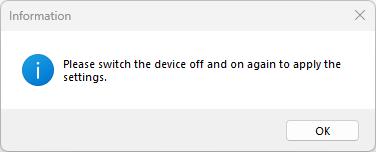
Alternatively, close the app to exit without applying new settings - keep existing existing device settings.
Automatic IP configuration
Automatic IP is less common as it requires a local network with a DHCP server, which may be provided by a router.
Note that the DHCP server may allocate different IP addresses to the scan controller, which may require updates to clients settings! If possible, set the DHCP server to reserve an IP address for this device.
If not already installed, please connect the 5 m ETH cable provided with the hardware from the scan controller to the local network of the microscope or lab, then start the app and check the 'DHCP Enabled' box.
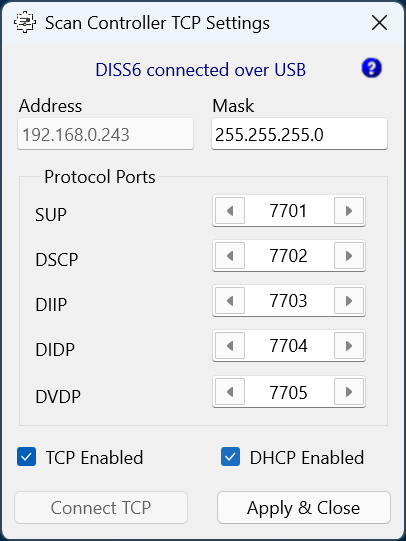
Note that the 'Address' text input is disabled. For reliable reading of the actual IP address of the device, it is always recommended to read the IP address from the display panel on the front of the hardware scan controller.
Then click on 'Apply & Close', which will prompt to switch the device off and on again, to apply the settings.
Alternatively, close the app to exit without applying new settings - keep existing existing device settings.
Help
Please click the question mark '?' in the top right of the app to open a local help file or navigate to the online address of this user manual.